Garden Re-Hab Begins!
We had rain last week, pouring rain, 37 degrees. Yesterday it was 75, then a cold front came thru last night, coming in with 65 mph gusts, then back to 29 degrees this morning! Nice to be able to have lots of fresh air when the weather's warmer! This last weekend we started our backyard garden rehab, here's a few things we will be doing. We will re-use/recycle as much as we can, as usual! *Check newer posts for the photos of completed areas! *
Phase One- The west side of our backyard fence takes the brunt of bad weather coming in, as well as the large dogs of the renters who live behind us jumping on it. I could go on about the different people who've lived there, but the people are pretty nice right now. The dogs not so much. They're the kind of dogs that bark all day long on and on randomly. My fantasy was that the house would come on the market, Dave and I could buy it, and create a cohousing situation with one of our kids and family. Not to be and we don't have the money for that anyway. I digress! So Dave found three broken posts-

rotted
We didn't want the whole fence to collapse obviously, especially with dogs on one side and our chickens on the other, that would not be a good idea!

Behind the coop
Previously when we had put posts in the ground we used gravel and then a layer the concrete. The problem was when the posts broke you have to dig out all the concrete. There's some nice post brackets you can buy now, about $20.00 each with the bolts-


It's a bit of an investment but once you put the post in the bracket and set it in concrete, you're done. Just level and brace until it's set up. The advantages if the post itself ever breaks you simply unbolt, pop out the post and add a new post into the bracket! No more busting out concrete. So we decided to invest in three and it works great! We did re-use the fence clips on the stringer boards, since they were fine-

I helped Dave cut the 4" x 4" to size and level the posts once they were in the hole. Once they were shored up Dave poured the concrete and let it sit overnight. Problem solved, nice solid fence again! So that was Phase 1. We saved the 6' old posts to shorten and use in a garden fence project.
Phase Two- The raised bed, which is rotting and pretty unsightly. I found that I can grow the vegetables in another sunnier area. I looked out one day and I thought this is just an ugly view (see top picture too) to look at every single day-

Bamboo and 2 Boxwoods will be re-located here

Lots of hardscaping materials in the right corner
Bear with me here I will get to the point of this. I was channel surfing one night and caught the last 15 minutes of a movie called Dare To Be Wild-
Trailer
I was fascinated by the story, really got hooked and so I bought the DVD used on eBay. I highly recommend this movie, if you love to grow things! It is based on the true story of Mary Reynolds, the youngest competitor in the British Chelsea Flower show. She created a totally natural design that looks like something in the Irish meadows in the forest. It was totally unlike anything anyone had done before there, she won first place!!! She became an international sensation and is now listed as one of the top 10 garden designers of all time. She has also moved into Permaculture work more recently. Lots of great interviews with her on Youtube. Here's her award winning design-

Celtic Sanctuary

After I watched the whole movie (which I absolutely loved), I got her book from the library. It's called The Gardening Awakening, Designs to Nurture Our Land & Ourselves (she's working on a second book) :
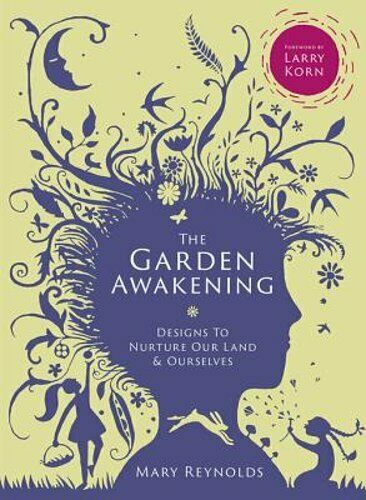
I looked at some of her designs and they're just amazing. Lots of curves. I flipped through the book one day and spotted this design and that was my Eureka moment!


With our square house, sitting in our square backyard, and the square fence a circular design would be perfect! We will modify it to fit the space with our hardscaping on hand. We have bricks, river stones, pavers and some Flagstone. Since we already had a pile of hardscaping leftover from various projects, and that we acquired for free, I thought we could do a nice semicircle. I decided to go ahead and grow different plants, flowers, an evergreen tree and herbs in this area, since it gets partly shade. Create some habitat for the birds and critters, something soothing. So basically we will remove the cold frame, add some hardscaping to create the curves. We also have two Boxwoods to be moved and a Bamboo-

Behind the maple tree

In the chicken shade area

In the sunny veggie area
We're going to plant the bamboo and the boxwoods between the maple tree and the spiral to fill in the space. I'm wanting to get some bamboo that's tall for privacy screen against our fence, but haven't found any yet (sold out) , I will keep looking. Taking out the cold frame soon to start the process! The sunny bamboo area will be to grow more veggies and food, better se of the space. More coming...
Phase Three- The Garden on the south side of the house which has been problematic-

Solarizing the soil over the winter to kill weeds
We've had some luck with green beans there, some with corn or squash, but very inconsistent-

I thought the best use of the area might be for pollinators garden. I might have Dave build a little bench in there, a kind of a quiet place to go sit. Since it faces south I can do lots of my new seeds of Rainbow Echinacea, Rainbow Zinnias, Rainbow Yarrow, Milkweed Also some Lavender, Poppies, Salvias, Dwarf Russian Sage (just found those!) maybe some sunflowers. It's a blank slate! Maybe add a birdbath. I want a nice naturalized, low maintenance area...

Phase 4- The chicken run/garden fencing, which is also rotting and falling apart. We used mostly recycled lumber last time, and we got quite a few years out of it. We'll re-use the posts Dave replaced, since we can cut them down. Dave found some wire panels we may buy. Slightly flexible and a nice, clean look. Maybe stock/hog panels. I'm hoping we can run cedar across the tops. Dave may build a new gate. I'd like a metal one that won't get chewed! We thought about relocating the coop to where the cold frame is, but lumber prices have gone way up. We decided not to go that route this year. The coop is in pretty good shape, but it does eat up some of our sunny garden area. Just one of those compromises you got to make. So we will start from scratch with tearing all of this out and re-doing it-

Sloppy chicken wire for my flying hens! Safety first

Note marks on gate on the left, squirrels chewing!

Will add larger gate and remove boxwood

Girls had to come say hi!

Luna and Debbie

Sunny

Rosie the matriarch, soon to be 7!